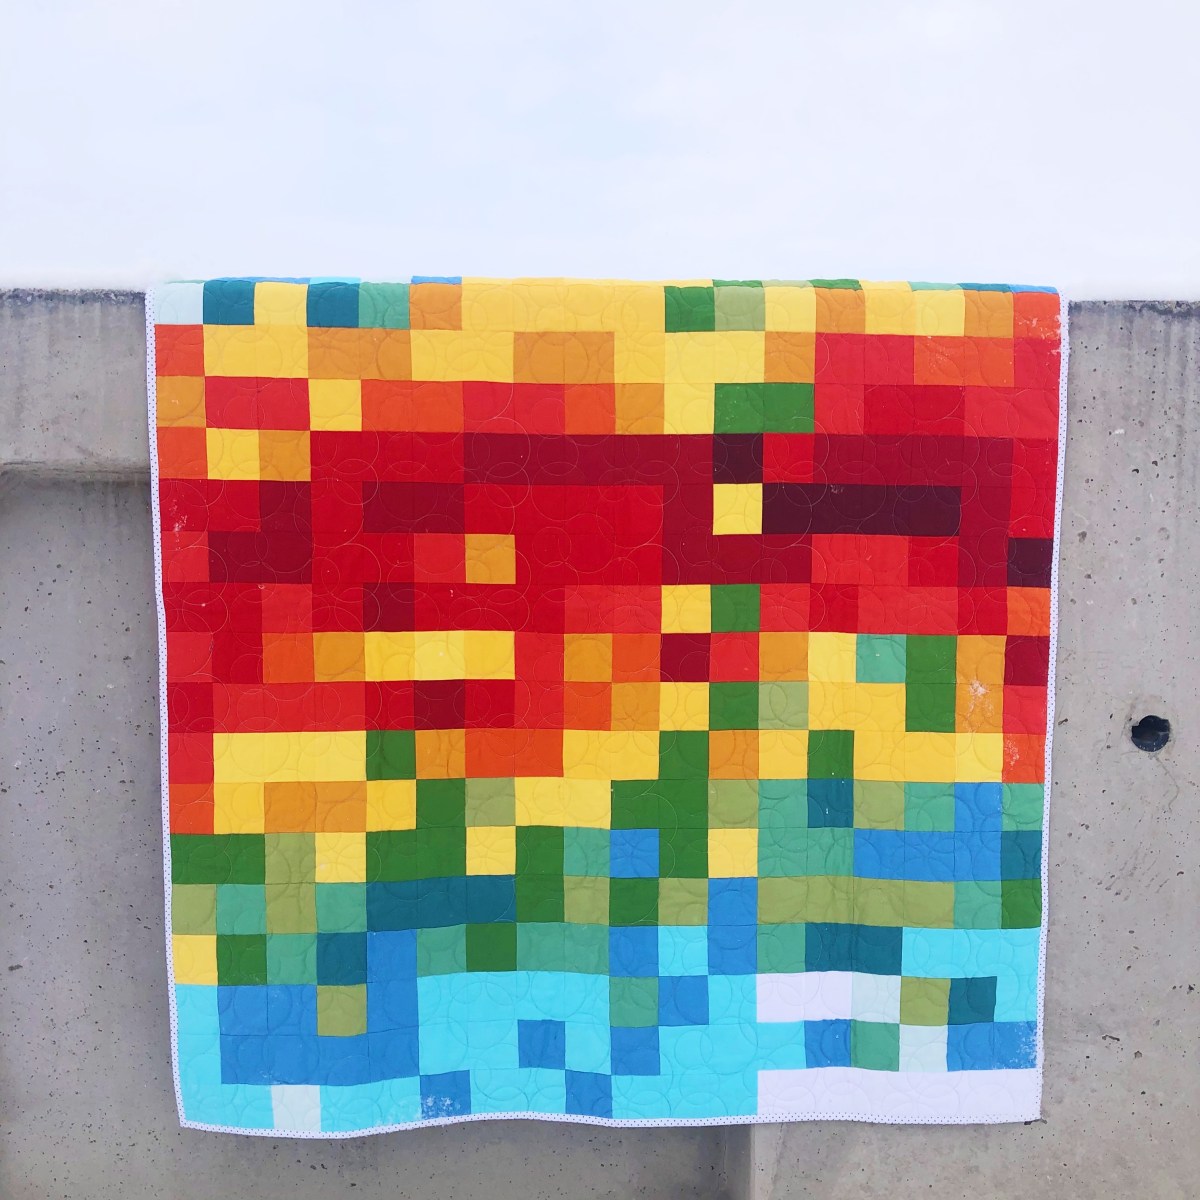
How to Make a Temperature Quilt
Today I’m excited to finally share how to make a temperature quilt!
I really enjoy making temperature quilts and both of these quilts were made 2 years ago….I even shared them at one of our Mod Bee Quilting Conferences….but I haven’t shared them here at Simple Simon until today.

Let’s start at the beginning:
What is a Temperature Quilt?
A Temperature Quilt is a quilt that chronicles the everyday temperature of a certain location for an entire year.
To make a Temperature Quilt the maker assigns a certain color or pattern to specific temperatures and then uses those colors or patterns in a set design to showcase the weather patterns for that year.

These quilts can come in a variety of shapes and styles…from columns to calendar blocks…but my favorite is the patchwork square.
I assign a square for each day of the years (so 365 squares) and then they “read” like a book…from top to bottom and left to right. Starting at January 1st and ending with December 31st.

This particular quilt is from the year 2020…that’s right…2020.
It was a notable year for so many reasons….good and bad…but all memorable.
And because I spent so much of that year in my own backyard with my family….with the weather as our backdrop…it seemed only natural to make a temperature quilt for 2020.

For temperature quilts I assign a certain color for the high temperature of each day.
I’ve made several solid color temperature quilts and my color/temperature maps usually look very similar to this:
Below-19: White
20-29: Bleached Denim
30-39: Waterfall
40-49: Riley Teal
50-59: Holly
60-69: Riley Lime
70-79: Riley Yellow
80-89: Cheddar
90-99: Riley Orange
100-Over: Tomato
***All colors are Riley Blake Solids.***

The squares in this quilt were each cut at 3.5″ x 3.5″.
(Making this quilt finish up at approximately 54.5″ x 54.5″)
And I used this template to as a guide to fill in the temperature for each day of that year:

(You can get a free printable version of this temperature map HERE…and it also comes with a short list of instructions, tips and tricks.)
This map will work for any size squares…the only thing that will vary is the finished size:
Finished Sizes:
*If squares are cut at 2”x2” finished size without borders will be: 27.5”x 27.5”
*If squares are cut at 2.5”x2.5” finished size without borders will be: 36.5’ x 36.5”
*If squares are cut at 3”x3” finished size without borders will be: 45.5” x 45.5”
*If squares are cut at 3.5”x3.5” finished size without borders will be: 54.5” x 54.5”
*If squares are cut at 4”x4” finished size without borders will be: 63.5” x 63.5”

This is another temperature quit that I made using the same template but instead of using solid fabrics I used random prints from my scrap bin.
I also cut each square at 2.5″ x 2.5″ and then added a white border.

These quilts are so easy to cut and sew. I just chain piece while I listen to an audio book.
Plus the supplies are easy to round up! All you need to make a temperature quilt like these is:
*365 squares
*white fabric for blank (extra squares) and for a border
*any extra fabric for additional borders

And once you get started there are loads of ways to make them your own. Here are a few ideas:
VARIATIONS:
*Use scraps from your scrap bin, prints, or solids.
*Use raindrop prints on days it rains. Use snowflake prints on days it snows.
*Use holiday prints to act as time markers throughout the year.
*Separate the months by using plain white squares.
*You can sew an entire year at once by looking up temperatures on websites like AccuWeather OR you can work through the current year sewing up squares a week or a month at time as the year progresses.

Here are a few tips for putting together a block style Temperature Quilt like mine.
Construction Tips:
*Fill out the temperature quilt map with all of the temperatures for the year before you begin (or if you are sewing as the year progresses fill it out as you go).
*On the quilt map you have 21 rows of 18 squares. This gives you a total of 378 squares but there are only 365 days in a year. This gives you 13 extra squares. I sew 6 blank squares into the top left corner and 7 blank squares into the bottom right corner….this gives me some extra blank space to do things like embroider the year onto the quilt.
*Assign temperature ranges to certain colors or patterns before you begin.
*Cross out each square on your quilt map as you sew along to keep on track.
*Using a ¼ inch seam allowance sew each row together. Work from top to bottom and left to right. Once the rows are completed sew the rows to one another working from top to bottom.
*When pressing…press seam from Row 1 to the right, from Row 2 to the left, from Row 3 to the right and so forth. This will let the seams from each square nest nicely as the rows are sewn together.

Temperature Quilts are fun to make….for a memorable year, a birthday year, an anniversary year, a graduation year, a significant year, etc.
I’ve made several and have never regretted it.

Again, if you want a free printable quilt map (and some short instructions) to make a Temperature of your own just click HERE.
And if you finish one up share it with us! We love to see your work.
Happy Quilting!


