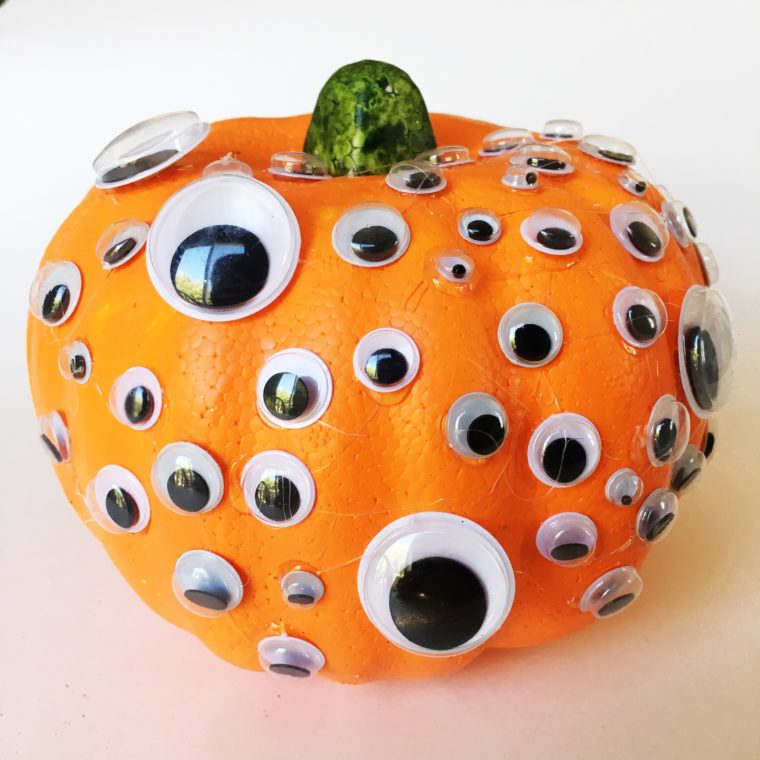
Today we have a pile of pumpkin projects for you to make using Dollar Store stryofoam pumpkins…so let’s get started!

Grab some googly eyes, your glue gun, and a pumpkin and within a few minutes….

BAM!!! You will have a loveable pumpkin monster. (Just remember to pick off all the glue hairs that you can still see swarming the pumpkin man above. Unless that is the vibe you are going for…in which case glue hair it up.)
Next….

Find yourself some little creepy crawlies (I used rubber scorpions from the Dollar Store but you can also use spider rings…just snip off the ring part with a pair of scissors). And then you will need a paint brush, white paint, black paint, and your glue gun.

Start by painting your pumpkin white. This may take a few coats.

Then paint the stem black.

And finally glue on your critters!
Critters not your thing? Then maybe try this one….

Grab your pumpkin, mod podge, and some glitter.

Now cover the entire pumpkin (minus the bottom and the stem) in mod podge.

Then starting at the bottom and working towards the top sprinkle your pumpkin with glitter.
(And I always add a little extra when I get to the top for good measure…because…glitter.)

And your done!
(I used a fine copper colored glitter from the Dollar Store but any glitter will do!)
Glitter too messy? Alright. How do you feel about clowns?

Along with your pumpkin gather up your glue gun, some paint and a pile of fun colored pom poms.

Next paint your pumpkin white.

Then add a face…evil or happy…it’s your choice…but either way to me it will still be creepy.

And now finish him off by gluing on a pom pom nose and colorful pom pom hair.
Clowns not your thing? How about flowers?

For this project you will again need your glue gun as well as some ivory colored paint and some fake flowers.

Start by painting your pumpkin ivory.

And finish up by gluing a crown of flowers around the stem of the pumpkin.
Not spooky enough? Ok, then try this one:

Grab some paint and a pile of strait pins. (Tacks will also work.)

Paint your pumpkin black and then let it dry.

Finish it off by spelling out a spooky message of your choice using the straight pins.
Too literal? Do you need something weirder?
Alright. Try this one out:

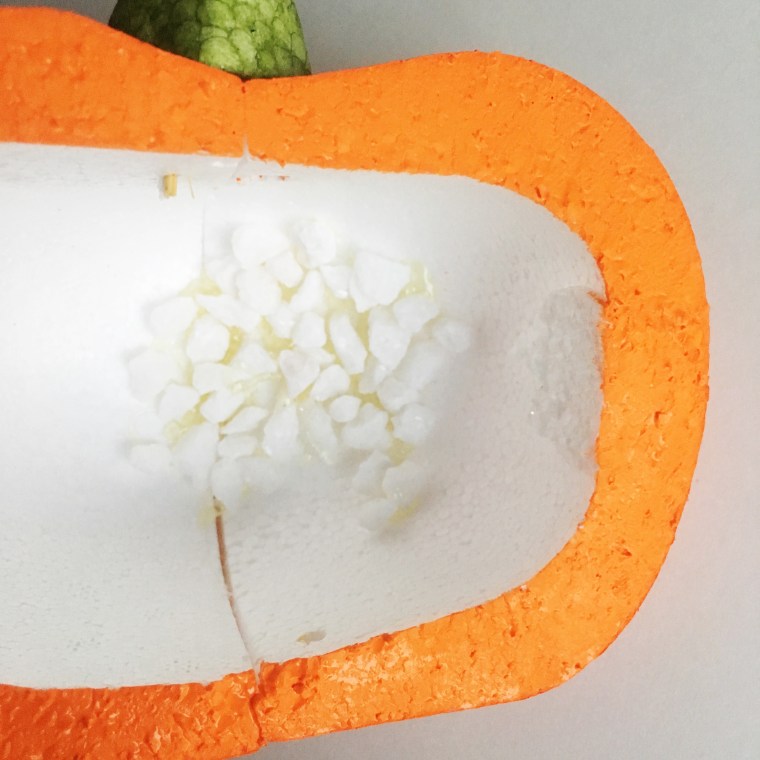
You are going to need purple and blue paint, a bag of tiny white rocks, a knife, and your glue gun.

Start by slicing your pumpkin almost in half. (I cut mine right in front of the stem…leaving it in tact.)

Next, starting at the back and working your way out towards the front, glue your tiny, white rocks along the entire surface of the inside of the pumpkin.

After your rocks are secured in place take your purple and blue paint and add tiny bits of color inbetween the shadows and cracks of the rocks.

Once you have it colored the way you like you will have a crazy geode pumpkin.
Too strange? Alright let’s get back to what we know. Glitter.

Get out your paint, glitter, and Mod Podge.

Paint your pumpkin white.

Paint the stem black (or gold!) and let your pumpkin dry.

Now slop some Mod Podge all around the top 1/3 to 1/2 of your pumpkin. (I like to use an old paint brush for this.)
Just remember…anywhere there is Mod Podge there will be glitter.

Then sprinkle on your glitter and let dry!
Looking for something more traditionally Halloween? Alrighty then. We have one last project for you.

This one is a project that we just posted last week…and we made half a dozen different examples. They are super easy to make and you can find the entire tutorial for them HERE.
So that is it.
A pile of pumpkin projects that are fun to make and won’t break the bank.
Happy Halloween.


Fantastic ideas. I especially love the white w/gold glitter !