I’m excited about today’s post.
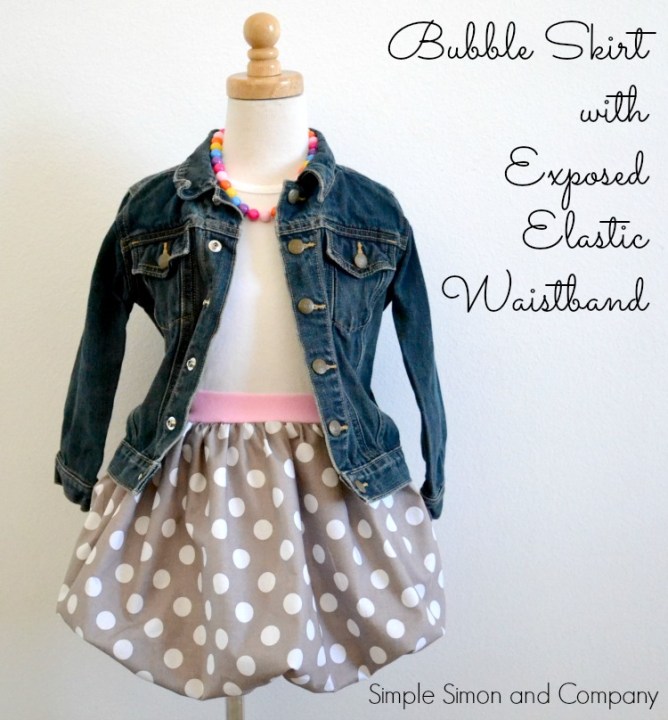
First of all it’s a bubble skirt…which I love…and it’s grey and white polka dot…another love…and I get to show you my cheater way to make fun colored exposed waistbands…AND…my favorite part…it was also the first project Ruth has “helped” me with.
Now Ruth is only three years old so “help” isn’t the right word here but she stuck with me through every step of making this skirt. (Which is why it took me three times as long to make as it normally would!)
It was terrifying to have her hand me pins…frustrating to have an extra set of hands pulling on gathering stitches…slow going pushing the fabric through the machine..but over all one of the sweetest afternoons I’ve spent in a long while.
I am amazed that my girl with the attention span of a guppy had the patience to sit through the entire process. And even more amazed that she has already asked to do it again. Man I love my baby Ruth….
Anyways, let’s get on to my cheater way to add exposed waistbands that are cute and colorful!
Here’s the secret: Headbands from the Dollar Store!
Seriously. I do this ALL THE TIME.
They have loads of colors and patterns and work wonderfully as waistbands for my little girls skirts.
All you need to do to make them into a working waistband is cut off the seam (or sometimes if I’m not being lazy I will unpick the seam) and lay them out flat.
Then measure your little one’s waist…Ruth is 20 inches which is bigger around than the headband. No problem!
I take two headbands and combine them!
In the picture above it shows the waistband I made for Ruth.
The pink section is 12 inches long and the cheetah section is 7 inches long.
I cut the pieces to differ in length but still equal Ruth’s waist measurement minus one inch when added together.
You will do the same thing…measure out enough elastic that it will equal your little ones waist measurement minus one inch.
(I subtract the one inch because with seam allowances and that missing inch the waistband will fit nice and snug. The headbands tend to have a fair amount of stretch to them so I like to cut them a tad smaller than I normally would.)
Once your headband/waistbands are cut sew them right sides together to form a continuous circle that will become your finished waistband!
Now just attach it to your skirt!
It’s so easy! And a really inexpensive way to add a little flair to your children’s garments.
For a full tutorial on how to make and attach an exposed elastic waistband you can look here: HOW TO MAKE AN EXPOSED ELASTIC WAISTBAND
And for a full tutorial on how to make a bubble skirt (which is the type of skirt that I have pictured today) just click over here: BUBBLE SKIRT TUTORIAL
(Just note on the bubble skirt tutorial that there is a different waistband. It can easily be omitted however and replaced with this one I’ve just shown you!)
-liZ
PS: Today’s entire project came about because of Project Run and Play. This month we’ve started a new format over there where everyone can sew along with a free pattern or tutorial that has been hand selected by a former contest. And for January Alida (from Alida Makes) has selected her bubble dress to inspire us all! Thanks Alida!


You are a smart lady, lady! I would have never thought to use headbands as waistbands. I’ve got a Craft Gossip post scheduled for later this morning that links to your tip: http://sewing.craftgossip.com/tutorial-use-dollar-store-headbands-to-make-an-exposed-elastic-waistband/2015/01/08/
–Anne
Oh, thanks Anne! I’m excited to see it up on Craft Gossip!
I have looked but can’t find a way to subscribe to your newsletter. Please email me the path to take! I want to follow your Block of the Month. Thank you!
Love this!!
Very, very clever and a great way to have inexpensive colour in the waistband. Pinning..
Ellie,
We are officially starting a newsletter on Monday! So all of the details will be on the blog on Monday so you can get signed up!
liZ
Thank you!
Thanks Pam!
That’s a great idea! Thank you so much.
What a perfectly fabulous idea! Those hairbands come in such fun colors!