 How to Bind a Quilt Tutorial
Today we are going to talk about how to bind a quilt. Once you have been doing this awhile you will find that everyone binds their quilts a little bit differently…so don’t be alarmed if you do it differently–we all have our quirks 😉
The tutorial today is for a straight-binding on a quilt. You can bind your quilt with bias binding (I do both depending on the quilt) but I have found that straight bindings are easier if you have never done it before. In a bias binding you can sometimes pull the binding too tightly (because the bias stretches ) and it can get mis-shapen on the quilt. So, we will do a tutorial for how to cut bias binding…but for today, let’s stick to straight binding.
There are also different camps of which bindings quilters like better—so I say do whatever works best for you! Quilting is supposed to be fun, so no stress about which is the better way (at least in my book)!
Now…let’s get started.
Here’s what you will need:

Rotary cutter, mat and ruler, fabric for your quilt binding and a marking pencil.
The first thing you are going to do is cut your binding into long strips. I like to do 2.5 inches (but I am abnormal—I like fatter bindings) I think most quilters like to do 2.25 inches. Again I say—-do what size makes you happy!
After you have your strips cut (I roughly estimate about 40 inches of binding per strip and do the rough math of the quilt in my head–and it usually works) you are ready to sew the strips all together.
Take two strips and lay them at a right angle like the picture below. Take a marking pencil and draw a line from the top left corner where the two strips meet to the bottom right corner.

Then stitch along this line. Cut off the two triangles on the corner and fold out. Repeat for all binding strips.
Then you are going to take your binding to your iron and iron it in half. You should have a long strip of binding that looks like the picture below.
Now we are ready to sew it to your quilt.
Using a 1/4 inch seam allowance sew your binding to your quilt. Please note–the quilt I was sewing my binding onto had a very thin batting so I didn’t use my walking foot—you might need a walking foot to do this part.
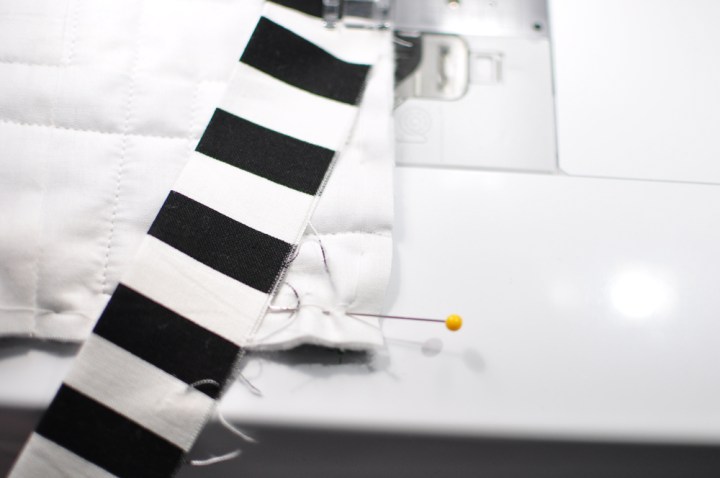
Keep sewing until you are 1/4 inch from the bottom corner. Mark this spot with a pin like the picture below.
When you get to your 1/4 inch mark you are going to take one or two back stitches and then stop sewing. Cut your threads now.
Take your quilt binding and fold it up to form a 45 degree angle at the corner (this is going to make your mitered corner).
Now turn your binding back down ON TOP of the 45 degree angle and place a pin to hold it down. Now starting at the top right edge, sew your 1/4 inch seam allowance down this side of the quilt. Repeat this until all quilt sides have been sewn.
I finish off the ends where my two pieces start by folding the first end at a 45 degree angle (just like I did at the corners) and then sewing the second strip over the top. This is what it looks like where the two ends meet.
And you binding is on! You can now pin and hand stitch the back….which I will show you how to do on Friday!
~Elizabeth


I love binding a quilt. I love the hand time spent on it. Add a good movie and family time around the couch and you have perfection.
Beautiful binding!