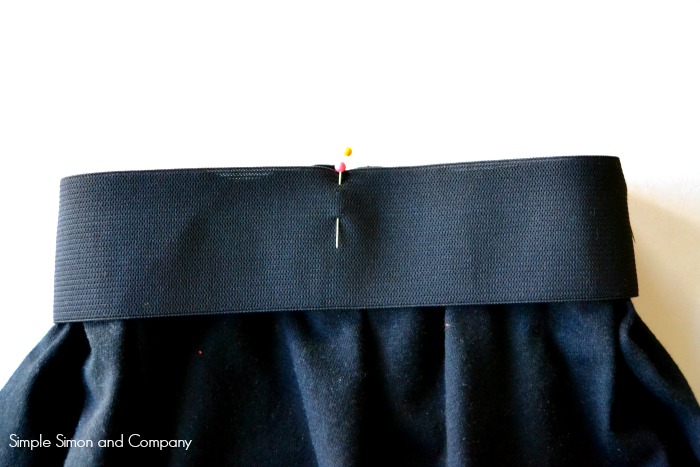
Recently I’ve been on a skirt making binge….for myself…for my girls…for fun…and today I want to share one of the easiest waistbands you can put on a skirt:
I love these waistbands! For myself and for my girls. They are easy to make, comfortable to wear and can be put on a wide variety of skirt styles.
Here’s how to do it!
Get some wide elastic…many stores carry both 2 and 3 inch widths and now I’ve started seeing fun colored and patterned elastic online as well.
Cut your elastic to your waist measurement minus one inch.
Sew the ends of your elastic together. (I usually go over this at least twice to hold the elastic together securely.)
Fold your elastic in half with your sewn end on one side and then with a pin mark the other side.
Now fold your elastic again but this time fold it so that your pin and your sewn seam are touching in the middle. Mark each edge with a pin. Now you have your waistband marked in quarters!
Put your waistband aside and find your skirt. It doesn’t matter if your skirt is hemmed or not but your skirt does need to have it’s side seams all sewn up and ready for a waistband.
Once you have your skirt fold it in half, mark points with pins. Refold with those pins touching and pin the two new end points. (It’s the exact same process that you just did with your elastic waistband. All you are doing is marking your skirts into 4ths as well.)
Now you have 4 pins in your skirt and 4 pins in your waistband.
With right sides together line up the pins from your skirt to the pins from your waistband and pin the waistband to your skirt. (Note: Watch where you put the seam in your waistband…you probably want it on the back of your skirt and not the front 🙂 )
The circumference of your waistband will probably be smaller than the circumference of your skirt. That is fine. As you sew you will stretch your elastic as you feed it through the sewing machine so that the elastic will be made the same length as your skirt fabric….and which will create cute gathers when you are no longer stretching the elastic out by hand.
When you sew also note that you will have pinned the elastic to the top of your skirt with right sides together….sew about 1/4 to 1/2 inch down from the top of your skirt/elastic. That way when you finish and flip your elastic up you will have 1 and 1/2 to 2 and 1/2 inches of your cute elastic waistband exposed (depending on the width of elastic you chose.)
Once you sew around the entire circumference of your skirt (I like to start and end at the waistband seam) just flip your waistband up and you are done!
Easy! (And comfortable!)
Happy Sewing!
-liZ
PS: I’m not the only one who likes these waistbands….even though I had made this skirt for Grace it was commandeered by Baby Ruth shorty after these photos were taken:
How much do I love this girl with her crazy 3 year old sense of fashion???


Thanks for sharing this tutorial! I’ve got a Craft Gossip post scheduled for this evening that links to your tutorial:
http://sewing.craftgossip.com/tutorial-exposed-elastic-waistband/2014/11/17/
–Anne
I have an elastic question for you vintage-pattern lovers. The directions used to say to cut elastic at a comfortable length PLUS a little for the seam. Now everyone says a comfortable length MINUS a little. What has changed? Is elastic more elastic nowadays, or has fashion dictated a reduction in ease? Do you know?
Do you sew with a straight stitch normal length (like 2.5)? That’s the only part I can’t figure out. 🙂 Thanks much for your tutorial!
Anita,
I keep mine stitch length at a 2.5 when I am doing this….that doesn’t mean that it is right but it’s what I do and it’s always worked for me. 🙂
Thanks Anne!
T,
I’m not sure what the real answer to your question is…possibly the elastic now and days is more stretchy…maybe back in the day they made garments so that there was still room to grow…maybe we are used to tighter fitting garments today….I’m not sure.
But….I do know that when I cut elastic like I do it fits me and my kids nicely around the waist…so it works for us and that is why I do it the way that I do.
Sorry, I wish I knew more. 🙂
-liZ
Thank you for the tute on elastic waistbands. I would really like to know what stitch to use. I have just bought a Janome 2050. Should I be using some kind of stretch stitch??
Thank you for this lovely tutorial… it was just what I needed to restyle a skirt for myself
Great tutorial, thanks for sharing it!
I *knew* this could be done but I couldn’t figure out how to do it! I’m so glad I found this tutorial.
Thank you so much for the tutorial; nice refresher. I only sew occasionally
what if the skirt I am making is out of cotton and I want to do the same elastic waist band you demonstrated on knits. The cotton will fray at the top. What do you recommend doing to keep that from happening before or after it is attached to the elastic?
adorable!!!
Thank you! My daughter’s skirt turned out great!!
Thanks so much for this tutorial. You helped me save a vintage dress that belonged to my grandmother.
Thanks you help me make my mini cycle skirt
I serge my edge first then attach to the waistband.