Today is Day #2 of our Pencil Skirt Sew Along and we are going to focus on sewing up our skirt. You should have your skirt sloper drafted and then your paper pattern traced on top with ease and seam allowances. In case you missed how to draft your pencil skirt on Monday, head to the Skirt Drafting Tutorial HERE.
And now we are ready to cut our fabric and sew up our skirt.
Step 1: Place your skirt front on the FOLD of your fabric (making sure the skirt is on grain). Cut ONE skirt front on the fold. Then cut TWO skirt backs. Mark your darts.
Step 2: Make your facings.
I like to make facings (a partial inside lining for the top of the skirt) for these skirts. If you are adventurous and want to line your skirt you are welcome to, or you can just turn over the top and finish with bias tape–which I will show you down a bit further. But I love the “finishedness” of a good facing. So I will show you how to make one.
Fold the dart out of your pattern. Just connect the two dart lines exactly as you would if you were sewing it up. Put a pin in it to hold the dart together. Then measure down 3.5 inches and mark a line that follows the top curve of your skirt. This will be your facing pattern. Trace this pattern onto a new piece of paper and repeat for the pattern back.
Then cut out your facing pieces as you did your skirt front (ONE on the fold) and skirt backs (cut 2). Stitch the side seams of your facing so that you have one continuous piece.
Step 3: Sew up the two front darts on your pencil skirt as well as the two back darts.
If you have never sewn a dart….please don’t fret they are easier than they look and I made a tutorial here that will explain exactly what you are going to do–SEW A DART TUTORIAL.
Step 4: With right sides of fabric together, sew the 2 back pieces to the skirt front at the side seams.
Step 5: With right sides together, sew your facing to your skirt top, using the seam allowance you cut for your pattern.
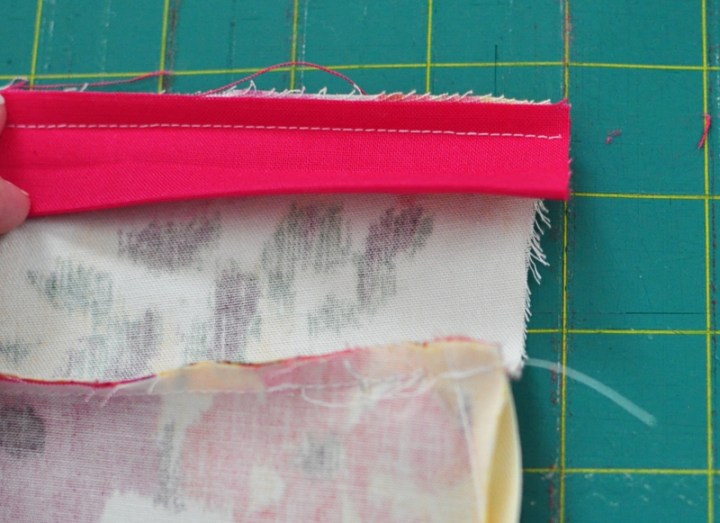
Step 6: Sew bias tape to your facing bottom to finish the raw edge.
If you have never done this before, you are going to open your bias tape up (there are 4 folds). Sew the bias tape of the TOP fold to the BACK of the facing piece.
Fold bias tape to the front of the facing and stitch the bias tape down.
Step 7: Insert your invisible zipper in between your skirt and your facing. If you don’t know how to do this….click here for a full tutorial on SEWING AN INVISIBLE ZIPPER INTO A LINING.
Step 8: Sew up your vent (if you put on in–see A Fashionable Stitches’ Tutorial) and then hem your skirt!
I have done skirts with just a regular stitched hem, hand-hemmed or you can do a blind-stitch hem (like I did on this skirt that I will show you on Friday). If you need a tutorial for a blind-stitch hem go here.
And you are done! We’d love to see them when you finish (don’t worry you have plenty of time!). Will you hashtag your skirts #pencilskirtsewalong so we can find them? Thanks a million.
~Elizabeth


Hello, a small comment : I really like your sew along concept. I don’t have the time this week (one kid is sick) but I”ll do my best to catch up…or do it next time!!
I sent your blog to a few friends and mentioned it in my blog !! I admire your pictures. Thanks for this nice skirt tutorial.
Marie
Hello,
Your post mentioned finishing the waist with bias tape. I would be interested in learning how.
Thank you!